Why bumpers wear damage differently than steel
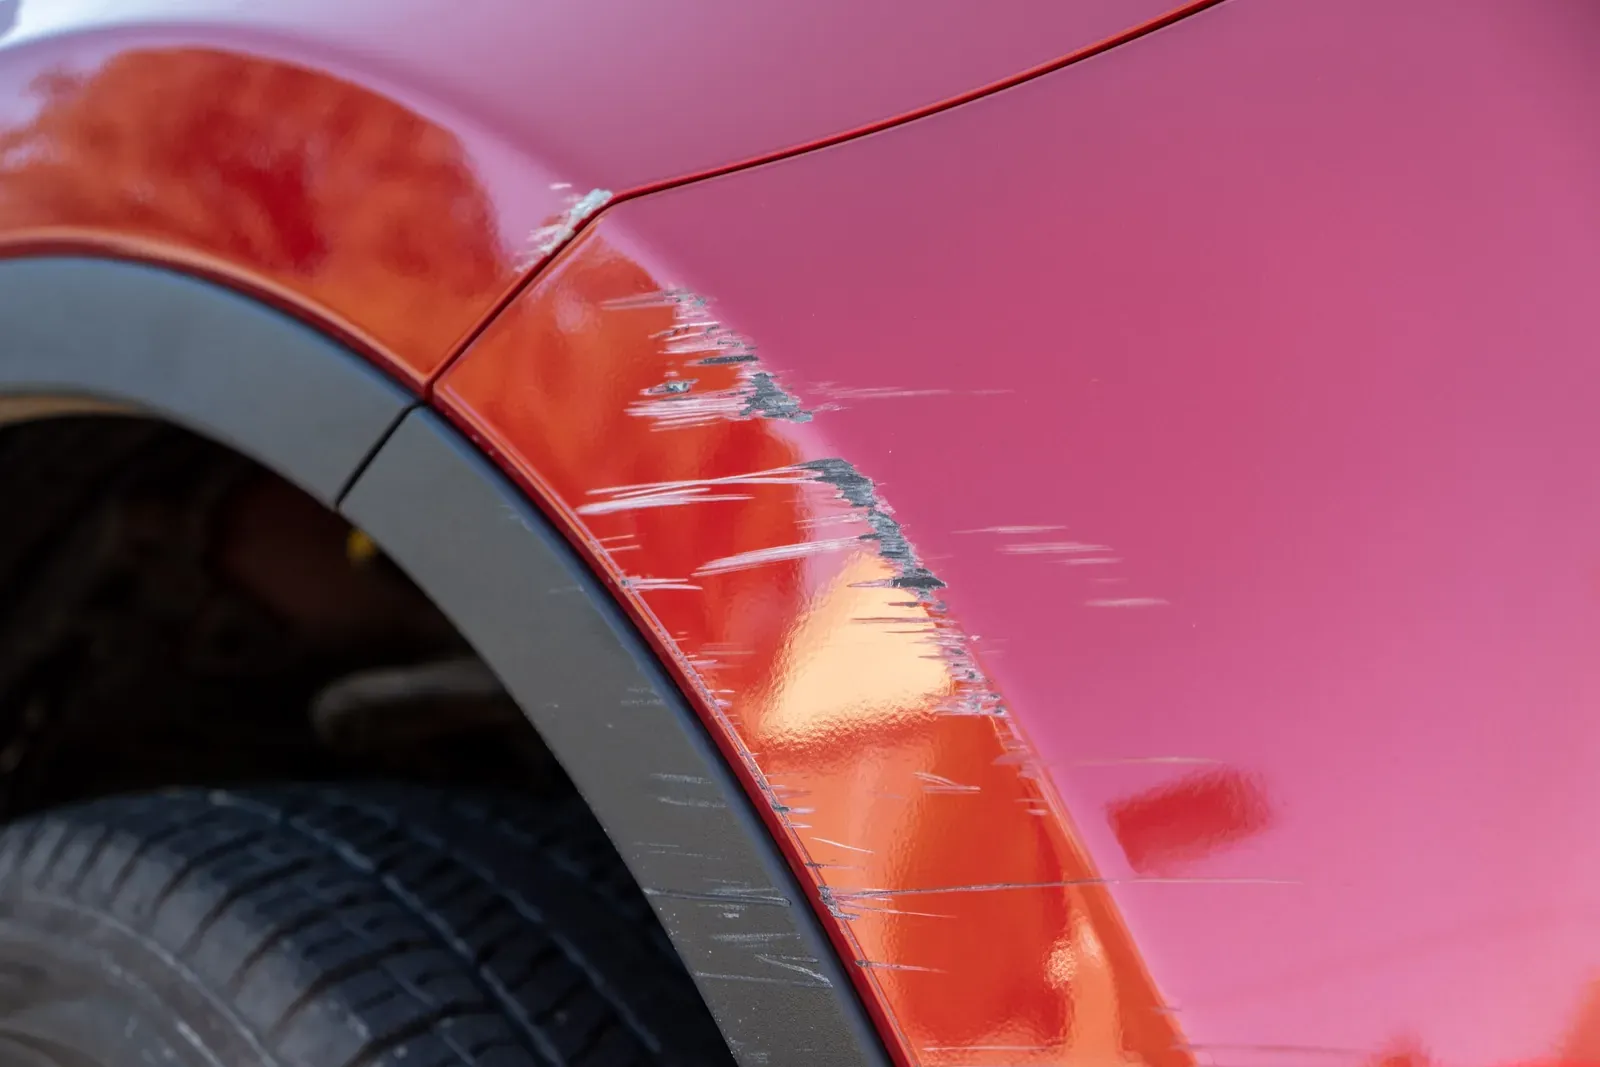
A bumper cover is a flexible plastic skin, and it goes first into everything — garage pillars, parking blocks, the bumper of whoever parallel parked behind you on a downtown street. When it scrapes, the paint scuffs while the plastic underneath can smear, gouge, or stretch. That flexibility spares you dents a steel fender would take, but it sentences bumper paint to a harder life: the finish must flex with the cover every single time it moves.
Flex is why refinishing a bumper is its own craft. Paint sprayed onto plastic without the right additives cracks the first cold morning the cover shifts, and colour over unsealed plastic can release in sheets. Temperature swings compound everything, since plastic grows and shrinks far more than steel — and a Toronto year swings from -20 °C to +35 °C without apology. Inside a shop these are solved problems, and they are exactly why parking-lot touch-up jobs fail.
The four fixes, lightest to heaviest
Most corner scuffs land in the middle two options below. A polish absorbs a surprising amount of damage when the clear coat held. Once plastic shows through the colour, refinishing is the honest fix, and the choice between a spot repair and the whole cover comes down to how far the damage spreads and how the surrounding paint has aged. Cracked plastic moves the conversation to repair-versus-replace, which has its own answer page worth reading before anyone quotes you.
How do we pick between the corner and the full cover? Mostly age and sun. Fresh paint blends beautifully, so a corner repair vanishes into it. A cover that has faded through years of summers can show a blend as a faint halo, and respraying the whole cover eliminates that risk. That call gets made with you standing at the car in daylight — never sprung on you as a line on the invoice.
- Polish: for transfer and shallow scuffs that never broke through the clear coat
- Spot refinish: sand and primer on the damaged corner, then fresh colour blended into the rest of the cover
- Full cover respray: for spread-out damage, multiple scuffs, or paint compromised by earlier shortcuts
- Replacement: for cracks, snapped mounting tabs behind the cover, or gouges too deep to fill with confidence
Why DIY bumper kits are visible from the sidewalk
Bumper repair kits are upfront about being cheap and quiet about being noticeable. The paint comes in a handful of generic shades rather than your car's exact colour variant, there is no clear-coat blending, and the repair ends in a hard line wherever the brush stopped. The result passes at night in a condo garage and fails on the street at noon — a slightly-off patch with a visible edge, on the corner every passerby looks at first.
Fairness demands naming where DIY does succeed: transfer and light scuffing genuinely answer to compound and patience, and we would rather you try that than pay anyone to wipe off a streak. The dividing line is broken paint. Once colour or raw plastic shows, a lasting fix requires real prep, sprayed colour, and blended clear — none of which fits in a tube. One honest exception: a dark, low corner on an aging commuter, where a careful brush job genuinely suits the car's mission, and we will tell you when that is true.
Textured plastic plays by different rules
The grained, unpainted plastic on lower valances, cladding, and running boards cannot be sanded and polished the way paint can — you would erase the moulded factory texture along with the scuff. Repairing damaged texture means replacing the piece or re-texturing it with specialized coatings that imitate the grain. That is a legitimate technique, though honest shops describe the result as close rather than perfect.
Sometimes the right move on textured trim is no move at all. A light scuff low on grey cladding disappears at any normal viewing distance, and we will say so when that is the case — put the money where it shows. Send photos and we will tell you which camp your piece is in.
Mind the parking sensors
Modern bumpers carry parking sensors, and a scuff near one earns a moment of respect. Sensors read through the cover, so a hard scrape can pop one out of its bracket or scar its face, and a proper repaint involves pulling them and reseating them correctly afterward. If the car started beeping at empty air — or went silent about real obstacles — after the scrape, say so at the estimate, because that detail rewrites the checklist.
This is also the case against gluing and painting around sensors in a driveway. Paint laid over a sensor face can deafen it, and a sensor left loose behind the cover rattles for the rest of the car's life. Neither problem costs much to avoid when the cover is handled properly, and a function check at pickup takes a minute and closes the question.
What separates a repair that lasts from one that peels
Durability lives in the steps you never see: washing silicones and road film off the plastic, feathering the damage smooth, sealing with adhesion promoter, mixing flex additive into the paint, and curing it fully before the cover returns to the weather. Skip any one and the bumper looks perfect at pickup, then lifts at a corner within a couple of freeze-thaw seasons.
Every refinish here carries our written lifetime warranty on paint and refinish work — an offer that only makes financial sense because the prep happens every time, on every cover. If your corner is scuffed, send photos to (647) 594-3401; the estimate is free, and small bumper work is among the quickest jobs on our board.